h1

Cranberry and Almond Breakfast Wreath

January 11, 2010

When I saw this recipe for a Christmas Breakfast Wreath, I knew I had to make it. It had almonds and it had cranberries, so I knew I couldn’t go wrong with this once. The recipe also included cardamon, which got me very excited since I have had cardamon seeds lying in my kitchen, unused since I could remember. I’ve only ever had cardamon in tea at my friend Sahar’s place. I learned from her that it is a popular spice used in Iran.

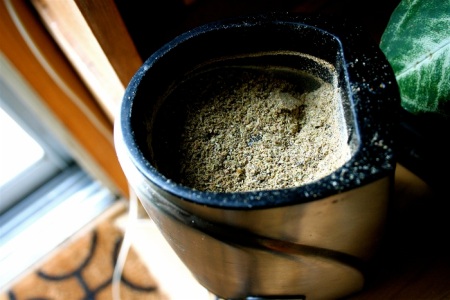
The recipe calls for cardamon powder, which I can only assume is finely ground cardamon seeds. Since I don’t have a spice grinder, I just used my coffee grinder, which I rarely use for grinding coffee any way. I am more of a tea drinker. I probably didn’t grind the cardamon finely enough, but I hope it didn’t make much of a different.

The wreath was quite easy to make and it was absolutely delicious. I cut down the cardamon to half a teaspoon and it was still plenty. Unfortunately my wreath became more of a ball, so if I were to do this one again, I would make sure to stretch out the dough much more before folding the strips.

Cranberry and Almond Breakfast Wreath

For the dough
2 1/2 teaspoons of active dry yeast
1/4 cup of warm water (about 110 degrees F/40 degrees C)
1/2 cup of warm milk
3 tablespoons of sugar
1/4 cup (1/2 stick) of butter, softened
1 1/2 teaspoons of salt
1 teaspoon of cardamon powder (I used 1/2 teaspoon)
2 eggs
zest of 1 lemon
3 1/2 cups of AP flour

For the filling
6 tablespoons butter, softened
1/3 cup AP flour
3/4 cup  chopped almonds
3 tablespoons sugar
3/4 cup dried cranberries
1 teaspoon of lemon zest
1 teaspoon  of almond extract

1. In a bowl dissolve the yeast in the water and let it rest for a few minutes.
2. In another bowl, combine the milk, sugar, butter, salt, cardamom, eggs and lemon zest and yeast.
3. Begin to add flour, one cup at a time, while mixing all of the ingredients.
4. On a lightly floured surface, knead the dough until smooth, about 10 minutes.
5. Place dough in an oiled bowl, cover with a kitchen towel or plastic wrap, and let rise until double in size (about 2 hours).
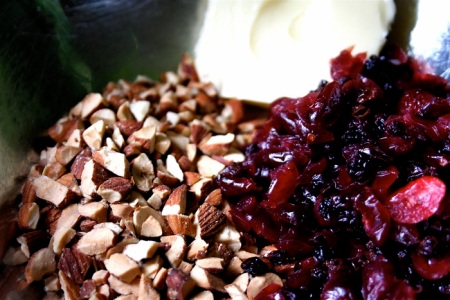
6. In a separate bowl, combine cranberries, almonds, flour, butter, zest, sugar and almond extract. Refrigerate this mixture until your dough has finished doubling.
7.  When the dough has finished rising, punch down on a floured surface. Roll out into a 9 x 30 inch rectangle.
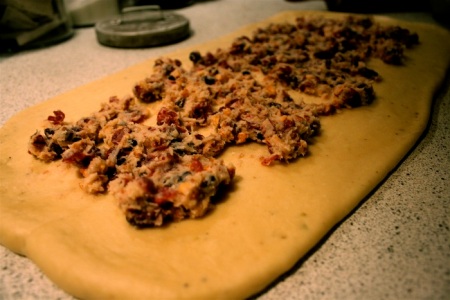
8. Spread the almond and cranberry filling onto the dough.
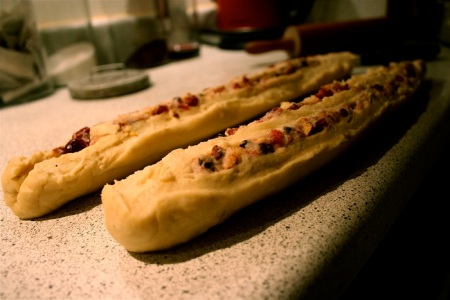
9. Begin to tightly roll the dough, making sure that the sides are sealed.
10. Cut the roll in two, making sure that the strips remain long.
11. Twist the strips around each other and form into a wreath.
12. Place on a baking sheet with parchment paper and let rise for another 40 minutes.
13. Preheat the oven to 180 degrees C/350 degrees F.
14. Place onto middle rack of the oven and bake approximately 30 minutes until browned.

h1

Semolina Halva with Pine Nuts

November 27, 2009

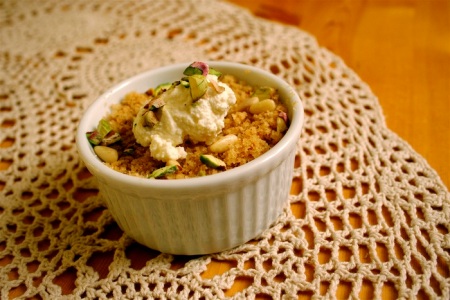
As part of a European food tour hosted by Kuchnia Ireny i Andrzeja called “Traveling Europe by Fork,”I prepared semolina halva with pine nuts. Every week, Irena and Andrzej choose a country in Europe (and the vicinity) and cook dishes that are traditional to that region. This week the chosen country is Armenia. After looking through dozens of dessert recipes, I decided on semolina halva, which is a dessert that is very popular in the Caucasus.

I always associated halva with the very sweet nut-butter block, and was very surprised to learn that the term “halva” covers a variety of desserts. The main ingredients include semolina and sweetened condensed milk. It’s very easy to cook, but it does require you to stand by the stove for about an hour. The smell of the toasted semolina with the sweetened milk while it was cooking was just lovely. It wasn’t spicy, but it was a sweet and comforting smell.  I would make this recipe again just for the aroma. My family enjoyed the halva, but nobody was crazy about it. Next time I will cut the recipe in half.

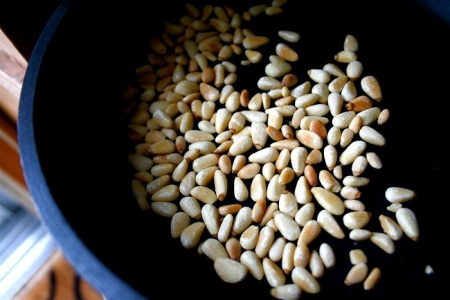
Toasted pine nuts.

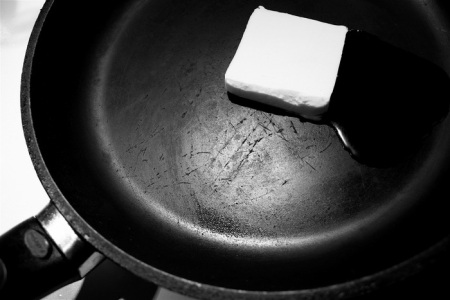
Butter melting with oil.

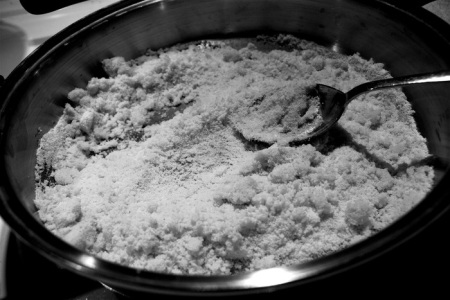
Semolina being toasted in butter and oil.

Semolina soon after adding milk mixture.

Semolina Halva with Pine Nuts
(adapted from Cafe Fernando)
makes 6-8 servings

80 gr of unsalted butter
2 tbs of vegetable oil
250 gr of semolina (1 1/3 cup)
50 gr of toasted pine nuts (1/4 cup)
1 can of condensed milk (I used one that had 300ml)
1/3 cup of milk
ice cream and nuts for decoration (optional)

1. Melt butter with oil at medium heat in a wide saucepan.
2. Add semolina, stir and spread across the bottom of the saucepan. Stir every few minutes.
3. In the meantime, boil 1 1/4 cups of water in a separate pan and then add condensed milk and milk. Keep the mixture warm.
4. When the semolina has browned (about 20 minutes) pour in the milk mixture. When I did this, the contents of the saucepan began to spatter intensively, which really scared me, but it settled down after about 10 seconds. The semolina thickened almost immediately.
5. Cook on a medium-low for about 15 minutes, stirring every five minutes.
6. Take the skillet off the heat, place a couple of paper towels over the skillet and secure by placing the lid. Let steep for 15-20 minutes until extra moisture is absorbed. (I didn’t have to go through this step since the halva was already dry enough).
7. Add toasted pine nuts. Portion about 1/2 cup of the halva in ramekins or serving bowls. Add ice cream, sprinkle nuts and enjoy!

h1

Carrot Diamonds (or Fafernuchy)

November 21, 2009

Get it? Carrot Diamonds? I thought of the name myself, and yes, I am very pleased about it.
I have a particular curiosity for  baking cookies and cakes that include vegetables. Chocolate and beets? Carrot cake? I even tried a chocolate cake recipe that used tomatoes. I was never disappointed and nobody ever guesses what is inside. It was quite amusing to tell my dad, for example, that there is zucchini in his slice of chocolate cake. He wasn’t sure whether he should stop eating it or not. He didn’t. I am nevertheless sure that the line of what can ingredients can be used in desserts will become more and more blurred.
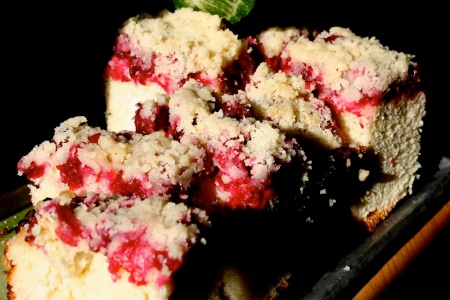
When I came across this recipe for “fafernuchy” on the Lubię gotować blog and immediately wanted to give it a try. After doing some further research I discovered that they are traditional to the Mazovia region, which is in east-central Poland. There are a million variations on this recipe. Some recipes use yeast, others use baking powder. Some use carrots, others use beets. You can use regular wheat flour, but you can also try using rye flour. What is common is that they are usually prepared during the holidays, and they are shaped into little diamonds.

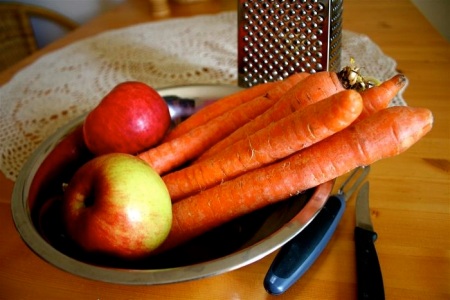
Peeled carrots, about to be grated

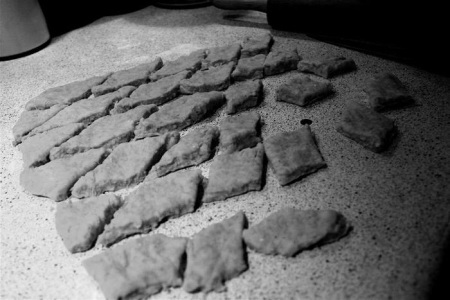
Dough before being set aside to rise

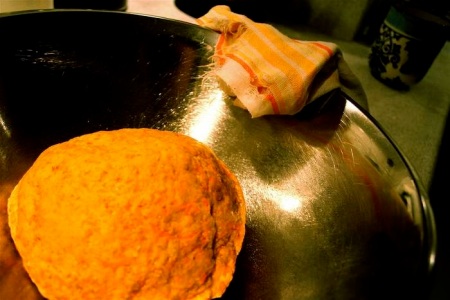
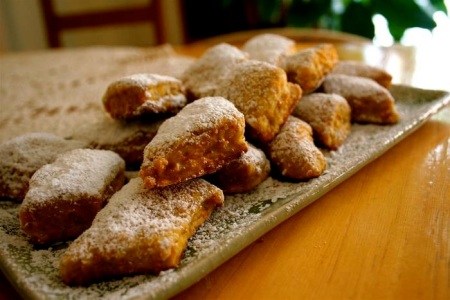
Just after being taken out of the oven.

Since I was already grating carrots, I decided to prepare a simple little salad from my childhood. I used only carrots, apples and a bit of sugar. My could also add a bit of grated onion for extra flavour. It goes great on the side of schnitzel, or any breaded and fried meat, as well as a roast.

Carrot Diamonds (Fafernuchy)
(makes about 80 small cookies)

– 250 gr of grated carrots
– 250 gr of whole wheat flour
– 250 gr of AP flour
– 2 large eggs
– 10 gr of dry active yeast (activated with 1/4 cup of warm water)
– 120 gr (1 stick) of butter (softened)
– 125 gr of light brown sugar (I would use a bit more next time)
– powdered sugar for sprinkling

1. In a bowl, sprinkle grated carrots with the sugar and set aside for about an hour.
2. Dissolve yeast into warm water and set aside until frothy.
3. Begin to combine eggs, butter, and yeast mixture with the flour with a wooden spoon or spatula. Add carrots and sugar.
4. Knead dough until soft and elastic, about 10 minutes. The dough miay be somewhat sticky, so may need to add up to an additional 1/2 cup of flour.
5.  Place dough in an oiled bowl and cover with a tea towel or plastic wrap. Set aside for about 1.5 hours, or until doubled.
6. Preheat oven to 180 degrees C (350 degrees F).
7. Punch down dough and divide in two.
8. On a floured surface, roll out dough to about 1cm (1/2 inch) in thickness. With a sharp knife, slice the dough diagonally into strips of about 3cm (1.5 inch). Slice the opposite direction to make diamond shapes. Set aside any leftover small pieces to be used with the rest of the dough.
9. Transfer diamond pieces onto a cookies sheet covered with parchment paper. Cover with a tea towel or plastic wrap and let rise for approximately 20 minutes.
10. Repeat with the second piece of dough.
11. Bake on the middle rack of the oven for 13-15 minutes.
12. Place cookies on a cooling rack, and let cool before sprinkling generously with icing sugar.
Carrot and Apple Salad

– 300 gr of grated carrots (about 4 medium carrots)
–  300 gr of grated apple (about 2 medium, a sweet variety like golden delicious is best, but any will do)
– 1 tbs of sugar
– 1/4 onion, grated (optional)

1. Mix all of the ingredients and serve.

h1

Biscotti!

November 21, 2009

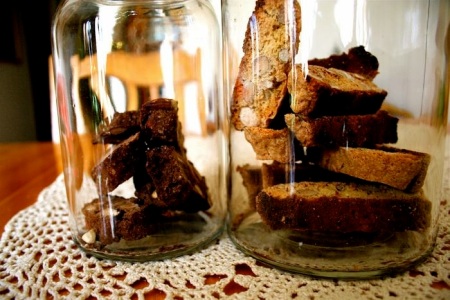
I really don’t think there’s anything bad to say about about biscotti… unless you have fragile teeth. But even then, you can make your biscotti soft. The crunch, flavour, versatility and simplicity of biscotti are irresistible to me. It is also one of those cookies that I firmly believe tastes just as good, if not better, without any butter added. Once you add butter, the cookie changes into something more decadent than a biscotti should be. I don’t always want decadent.

I have tried many kinds of biscotti, but I keep returning to the classic almond biscotti, which I think is best. I also wanted to make a chocolate version, as I was sure that my brothers would favour those. Sure enough, those were gone in half a day. Usually chocolate biscotti recipes use hazelnuts, but I just stuck with almonds.

Almonds are toasted, dry ingredients are ready to be mixed

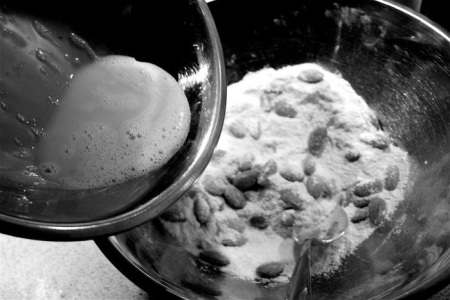
Wet ingredients about to be mixed with the dry ingredients

Dry ingredients for the cocoa almond biscotti.

The cocoa almond biscotti about to be put into the oven.

Almond biscotti cooling after first baking.

Almond biscotti about to be put in the oven for second baking.

The recipe I used is very loosely based on the one in Baking with Julia. I halved the recipe to make the regular, then chocolate version, but next time I’ll just stick to making whole batches. I hear biscotti keeps well, but I will never know since they’re always gone before I get a chance to see for myself.

Almond Biscotti

– 3/4 cup of whole almonds
– 1 1/4  cups of AP flour (I used 1 cup, and found it was a tad too little)
– 1 large egg
– 1 egg yolk
– 1/2 cup of sugar
– 1 tsp of orange zest (next time I will use 2 tsp)
– 1 tsp of baking powder
– 1/2 tsp of vanilla extract
– pinch of salt

Cocoa Almond Biscotti

– 3/4 cup of whole almonds
– 1 cup of AP flour
– 1/4 cup of unsweetened cocoa
– 1 large egg
– 1 egg yolk
– 1/2 cup of light brown sugar
– 1/2 tsp of vanilla extract
– 1 tsp of baking powder
– pinch of salt

1. Preheat oven to 180 degrees C (380 F).
2. Spread almonds onto a cookie sheet and toast in oven for about 7 minutes. Remove from oven and let cool.
3. Mix dry ingredients (almonds, flour, sugar, baking powder, salt, and cocoa if using) in a bowl and set aside.
4. In a separate bowl, mix wet ingredients well (eggs and flavouring).
5. Pour wet ingredients into dry and begin mixing with a spoon or spatula. Once the ingredients have begun to integrate, use hands to knead the dough. The dough may seem dry at first, but once everything is integrated, it will become a bit sticky.
6. Using your hands, roll out the dough into a log to about 25cmx7cm (11×3 inches) and transfer onto a cookie sheet covered with parchment paper. If you prefer “skinnier” and longer biscotti, flatten the log with your hands.
7. Place the dough in the oven on the middle rack and bake for about 30 minutes. The baking time will vary depending on the shape of your dough. Flatter biscotti will bake a bit faster. It will be ready when you see the edges of the log begin to brown. It is, however, better to over bake a bit than to under bake and have raw dough.
8. Remove log from the oven, place onto a cooling rack and leave until cool. This should take at least 30 minutes.
9. Using a serrated knife, cut the log into pieces approximately 2 cm (1 inch) thick on a diagonal slant. Place the biscotti back onto the baking sheet on their side.
10. Reduce oven temperature to about 160 degrees C (350 degrees F) and bake biscotti for another 15 minutes.
11. If you would like even crunchier biscotti, flip the cookies onto their other side and bake for another 10 minutes.
12. Remove, let cool and enjoy! If the biscotti is still a bit soft, leave them out overnight before putting them in a container.

h1

Cheater’s Apfelstrudel

November 21, 2009

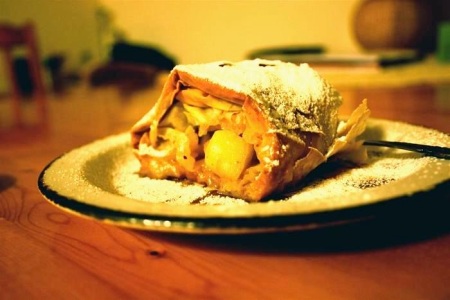
The colours are indeed a bit off, but I made the strudel in the evening and my living room does not have good lighting

Saying apfelstrudel is almost as fun as eating it. Almost. But you have you say it with a German accent.

This is a cheater’s apple strudel because it uses store-bought phyllo sheets instead of making the dough from scratch. I swear to attempt to make one from scratch one day soon, and I salute those who do so, but I think the phyllo really does make for a good substitute. Just a note on phyllo sheets… they are incredibly easy to work with, despite what some sources make it seem. They don’t dry up that quickly, and they don’t rip that easily either. Unless you lack opposable thumbs, you should be fine.

You can easily vary this recipe to fit your own tastes. If you like a thicker crust, use more phyllo. If you like your filling to be extra sweet, add more sugar. You can also use any nuts or dried fruit you like.

Cheater’s Apple Strudel
(makes one strudel)

– 6 sheets of phyllo pastry
– 1/2 stick of butter
– 2 large apples, or 3 medium apples (a tart variety are best, but almost any will do)
– 2 tbs of lemon juice
– 2 tbs of honey (or corn syrup)
– 1/4 cup of sugar
– about 50 gr of ground almonds (I toast and grind them myself in my little coffee grinder with a teaspoon of sugar)
– a couple handfuls of  coarsely chopped nuts and/or dried fruit.

1. Thaw phyllo sheets according to manufacturers directions. Usually this means overnight in the fridge, or a few hours at room temperature. Be sure to unfold the sheets gently, checking to make sure that they have thawed.
2. Peel and core apples, and chop into small cubes about 2cm (1 inch) thick.
3. In a separate bowl, mix apples with lemon juice, sugar, honey and any nuts and dried fruit you want to add. Set aside.
4. Melt and cool butter.
5. Place first phyllo sheet on a tea towel. Using a pastry brush, gently brush on melted butter over the entire sheet. You can also use a spoon, which is what I used before I owned a pastry brush, but it’s more work. Sprinkle sheet with about two teaspoons of ground almonds.
6. Place the next phyllo sheet directly on top, brush on butter, sprinkle almonds, and repeat for the remaining sheets.
7. Spoon the apple filling along one edge of the phyllo sheets, leaving about 2cm (1 inch) from the ends. Try to keep the filling as compact as possible.
8. Start rolling the phyllo pastry over the filling. Once the filling is covered, tuck in ends and continue rolling.
9. Place the strudel onto a cookie sheet covered with parchment paper. If I am out of parchment, I sometimes cover the cookie sheet with aluminum foil and lightly butter it. I would not recommend baking the strudel right on top of the cookie sheet because some caramelised juices from the apples are likely to spill onto the sheet while baking. Using parchment paper makes for the easiest clean-up.
10. Place strudel into a preheated over (180 degress C/350 degrees F) and bake for about 35 minutes.
11. Let cool for a good half an hour, but serve warm. After slicing, sprinkle the pieces with icing sugar.

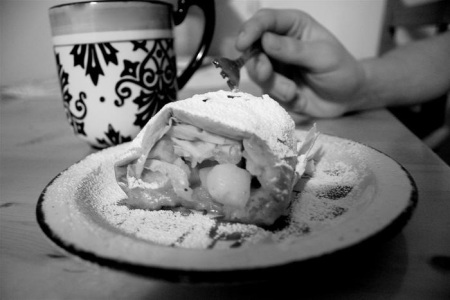
Thank you to my younger brother Jeremy, the best hand model

h1

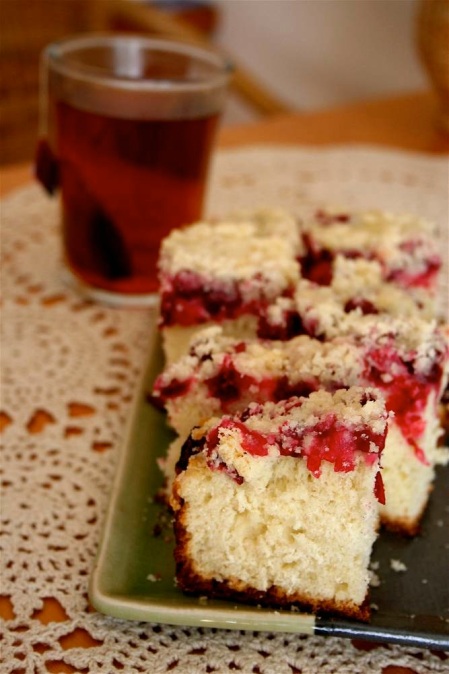
First Post – Cranberry Streusel Yeast Cake

November 20, 2009

For my first post I am putting up the recipe for a yeast cake that I made a few days ago. Yeast cakes are very popular in Poland, and are better known here as “babkas.” I love them because they aren’t overly sweet, but are still very satisfying. They are a favourite of my mom. In fact, she won’t touch North American cakes or European tortes.

For some time I have been craving a yeast cake with a tart topping and lots of streusel. I love tart fruits in baking: sour cherries, currants, cranberries, I’ll use them all! After our Canadian Thanksgiving I stocked up on cranberries and froze them for future use, so I decided to use those.

I soon realised that there would be a lot of dough, even for a 9×13 pan. This is often the case with older Polish recipes. Come to think of it, I would be interested in finding out why that is. Any ideas?

I took 1/3 of the dough after the first rise, rolled it out, spread it with jam, and made simple (but delicious) rolls.

The cake was delicious when it was fresh, but the next day it was rather dry. If I were making the recipe again for myself, I would use more butter in the dough, but if I were making it for my mom, she would not have wanted me to change it. For breakfast she likes to slice it and add butter or jam on top, and have it with coffee.

My dear mom, who loves dry cake

This recipe was adapted from Siostra Aniela of Anielska Kuchnia, which interestingly translates in English to Sister Angela of the Angelic Kitchen. She is s hugely popular cooking “celebrity” in Poland. Who needs Jamie Oliver or Giada DeLaraurentis when you can have Sister Angela show you around the kitchen? Is it a particularity of Poland that a nun can be a “celebrity chef”?

The recipe for the streusel was adapted from Moje Wypieki.


Cranberry Streusel Yeast Cake

Yeast Cake
– 80 gr of fresh yeast (I used about 30 grams of dry active yeast, activated in 1/4 cup of warm water)
– 1 kg of AP flour
– 5 eggs
– 100 gr of sugar
– 100 gr of melted butter
– pinch of salt

Cranberry Topping
– 450 gr of cranberries
– 3 tbs of honey
– 3/4 cup of light brown sugar

Streusel
– 180 gr of AP flour
– 100 gr of sugar
– 120 gr of butter
–  1 tsp of vanilla extract (I used a few drops of “śmietankowy” oil, which is a popular aroma in Poland, but I cannot think of an equivalent in North America. The name directly translates to “cream” flavour, but the taste is something between butter and vanilla).

1. Dissolve yeast in 1/4 cup of warm water and set aside until frothy, about 10 minutes. If using fresh yeast, dissolve in 1/2 cup of warm milk and a tablespoon of sugar and set aside until double in size.
2.  Mix flour with sugar and salt. Add eggs.
3. Add yeast mixture, begin mixing with a large spatula or wooden spoon.
4. Add melted butter and continue mixing.
5. Begin kneading dough until elastic. There should be no need to add flour. The dough will be neither hard or very soft, but it should be easy to knead.
6. Place in a clean bowl, cover with a kitchen towel or plastic wrap, and set aside to double. I put my dough in the fridge and let it rise overnight since I wanted to have the cake fresh for breakfast the next day.
7. In the meantime, mix cranberries with honey and sugar.
8. In a separate bowl, mix butter, sugar and flour and vanilla for the streusel. You can use a pastry blender, but I just used a fork. To get big streusel chunks, you can use melted butter.
9. Butter and flour a 9×13 baking pan.
10. When the dough has doubled, punch down and roll out to about the size the size of the pan. Cover and let rise for about half an hour. If you left the dough to rise in the fridge, let the dough rise an extra 45 minutes.
11. Preheat oven to 180 degrees C.
12. Top the dough with cranberries. Mine were sticky and clumpy because of the honey, so I took them apart with my fingers. Sprinkle the streusel on top.
13. Place pan in the oven. Bake for about 50 minutes, turning the pan 180 degrees halfway through. The streusel should start to brown a bit, but not too much.
14. Remove and cool on a rack.